

Manual Brick Machine Assembly Guide for Trading Companies from Shiyue Manufacturer
Tighter bolts do not guarantee a stable machine; in fact, over-torquing is the primary cause of frame distortion and premature mold failure.
Proper assembly of manual brick machines hinges on precise mold guide alignment and vibration table balancing, not just mechanical connection. Ignoring these steps leads to rapid mold wear and structural fatigue. A Manual Brick Machine Assembly Guide must prioritize geometric parallelism and dynamic balance over simple component attachment to ensure long-term operational stability.
The difference between a machine that produces consistent blocks for years and one that jams within weeks often lies in the first few hours of installation. In my early days facilitating procurement for construction projects in Lagos, I watched a local contractor struggle with a newly arrived QT4-15 unit. The team had tightened every bolt to its absolute limit, assuming maximum rigidity equated to quality. Within two hours of operation, the mold guides seized. The issue was not loose hardware but misaligned columns installed without verifying parallelism, compounded by uneven vibration forces that twisted the frame. This experience shifted my focus from mere logistics to technical oversight. Now, when I review installation protocols, I look for the subtle details that prevent such failures: the use of feeler gauges for gap verification, the symmetry of eccentric weights, and the specific sequence of torque application. [NEED_CITE: common causes of mechanical failure in concrete block machinery per ISO maintenance standards]
Understanding these principles transforms the assembly process from a risky gamble into a predictable engineering task. The following sections detail the critical steps required to assemble these units correctly, drawing from field observations across multiple regions where environmental conditions and local technical practices vary significantly.
What Are the Critical Pre-Assembly Checks?
Verification of parts against the packing list and inspection for shipping damage are non-negotiable first steps that prevent costly delays during assembly.
Before any wrench touches a bolt, the integrity of the delivered components must be confirmed. Shipping containers undergo significant stress, and heavy machinery like a QT4-15 can shift if not properly secured. A thorough visual inspection should focus on the main frame, vibration table, and hydraulic components. Look for signs of impact, such as dented plates or cracked welds, which may not be immediately obvious under layers of protective grease.
The packing list serves as the baseline for accountability. Missing pins, shims, or specific bolt sets can halt the entire assembly process. In Southeast Asia, a startup client once began assembly only to discover that the set of shims required for mold leveling was absent from the crate. They attempted to proceed without them, resulting in uneven brick density and excessive wear on one side of the mold. [NEED_CITE: importance of complete accessory kits in machinery installation manuals]
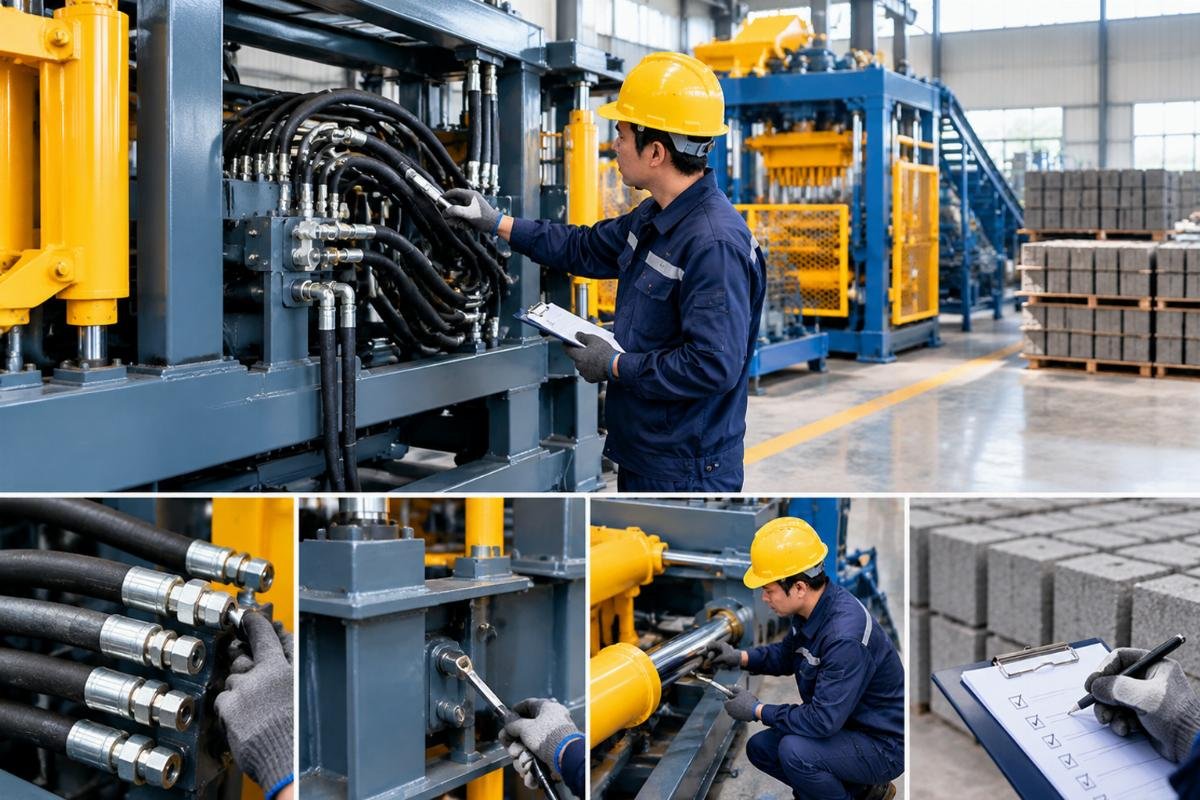
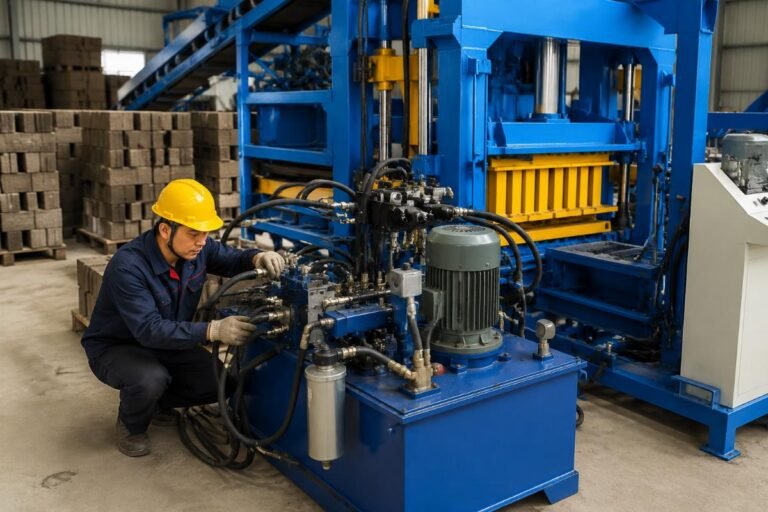
A systematic check also includes verifying the condition of hydraulic hoses. Ensure they are free from kinks or cuts that may have occurred during loading. Route them mentally before connecting to identify potential pinch points against the frame during operation. This pre-assembly phase is not merely administrative; it is a technical safeguard. By confirming that every part is present and undamaged, you establish a clean slate for precision assembly. Skipping this step often leads to mid-assembly searches for replacements, forcing technicians to rush subsequent critical alignments.
How to Align Mold Guides Correctly?
Mold fit is not automatic; manual shimming is often required to achieve the perfect parallelism necessary to prevent binding and uneven brick density.
The core of a manual brick machine’s performance lies in the movement of the mold box within its guide columns. If these guides are not perfectly parallel, the mold will bind, causing excessive friction, heat buildup, and rapid wear on the bronze bushes. Many installers assume that bolting the columns to the frame ensures alignment, but manufacturing tolerances and shipping shifts can introduce slight deviations.
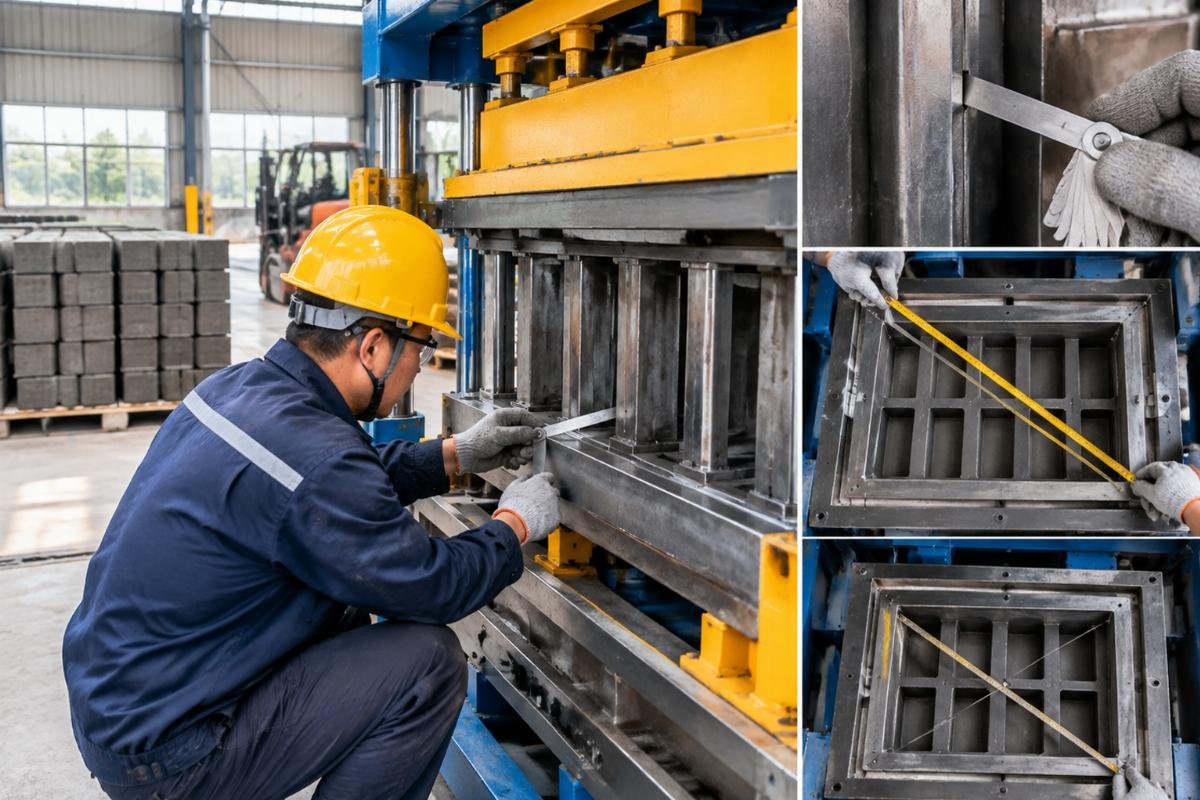
To achieve correct alignment, use diagonal measurements and feeler gauges. Measure the distance between the guide columns at the top and bottom diagonals. These measurements must be identical to ensure the frame is square. Then, insert the mold box and use feeler gauges to check the gap between the mold and the guides on all four sides. The goal is uniformity. If gaps vary, use stainless steel shims behind the guide brackets to adjust the position until the gap is consistent. [NEED_CITE: mechanical alignment techniques for precision guiding systems]
In a West African site, I observed a team install mold guide columns backwards because they ignored the visual markers on the parts. The lack of marking led to immediate jamming. This highlights the need for careful orientation checks before tightening. Once the gaps are uniform, tighten the guide bracket bolts gradually, re-checking the feeler gauge readings after each adjustment. Tightening one side fully before adjusting the other can pull the frame out of square. This meticulous process ensures that the mold moves smoothly under gravity and vibration, reducing the effort required by the operator and extending the life of the wearing parts.

Why Is Vibration Table Balancing Crucial?
Unbalanced vibration eccentric weights create destructive resonance that cracks frames and loosens foundations, rather than compacting concrete effectively.
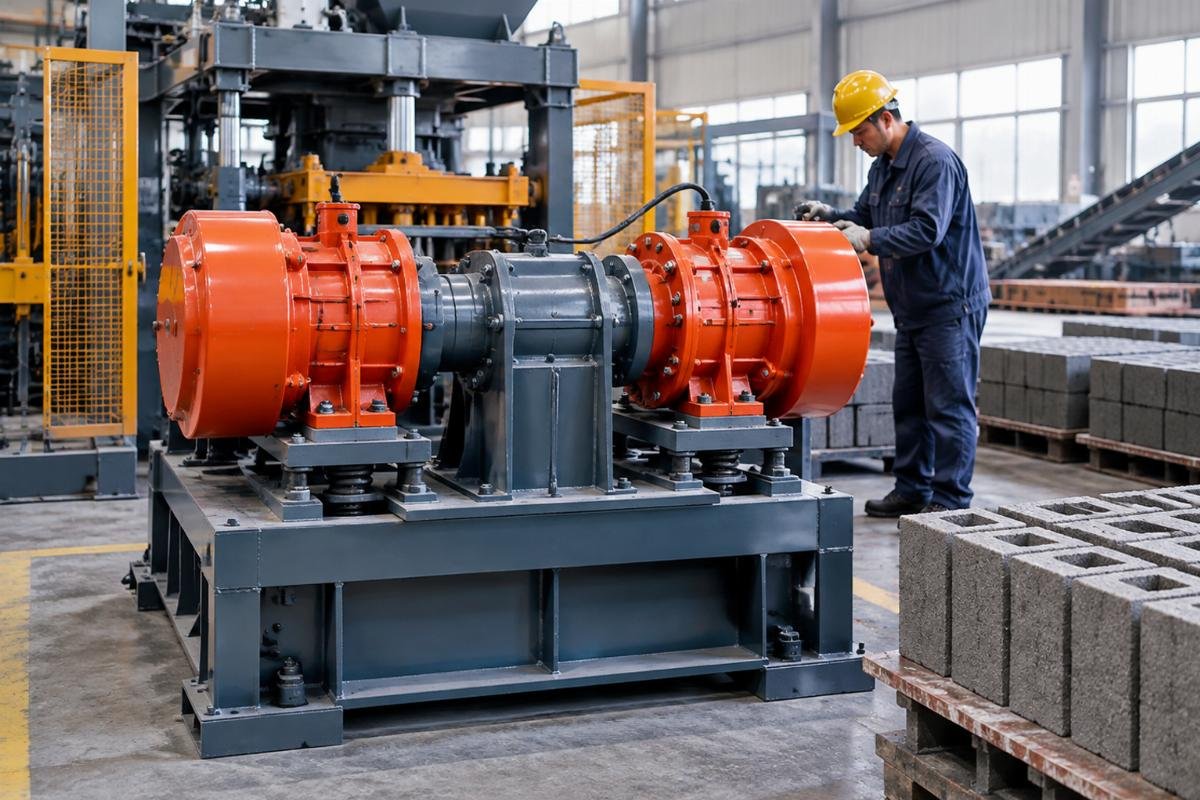
The vibration table is the heart of the block forming process, generating the force needed to densify the concrete mix. However, this force must be directed vertically. If the eccentric weights on the vibration shafts are not balanced symmetrically, they generate lateral forces that shake the machine apart instead of compacting the material. This imbalance places immense stress on the frame welds and foundation bolts.
Adjusting the eccentric weights requires precision. Ensure that the weights on opposite sides of the shaft are positioned at identical angles. Use a protractor or the manufacturer’s alignment marks to verify symmetry. Even a small deviation can lead to significant lateral movement. In a Southeast Asian startup case, unbalanced weights resulted in frame cracking after just three months of operation. The owner had assumed the factory setting was perfect and did not verify the alignment after transport. [NEED_CITE: effects of unbalanced rotating masses on structural integrity]
Balancing also involves checking the tightness of the weight locking bolts. Vibration naturally loosens fasteners, so use thread-locking compounds and verify torque specifications. A well-balanced vibration table produces a smooth, humming sound and vertical motion. If the machine walks across the floor or produces a rattling noise, the balance is off. Correcting this early prevents catastrophic structural failure and ensures that the compaction energy is efficiently transferred to the concrete mix, producing stronger blocks with less cement usage.
What Is the Correct Bolt Tightening Sequence?
Over-torquing strips threads and distorts frames; calibrated torque wrenches and cross-pattern tightening are essential for structural integrity.
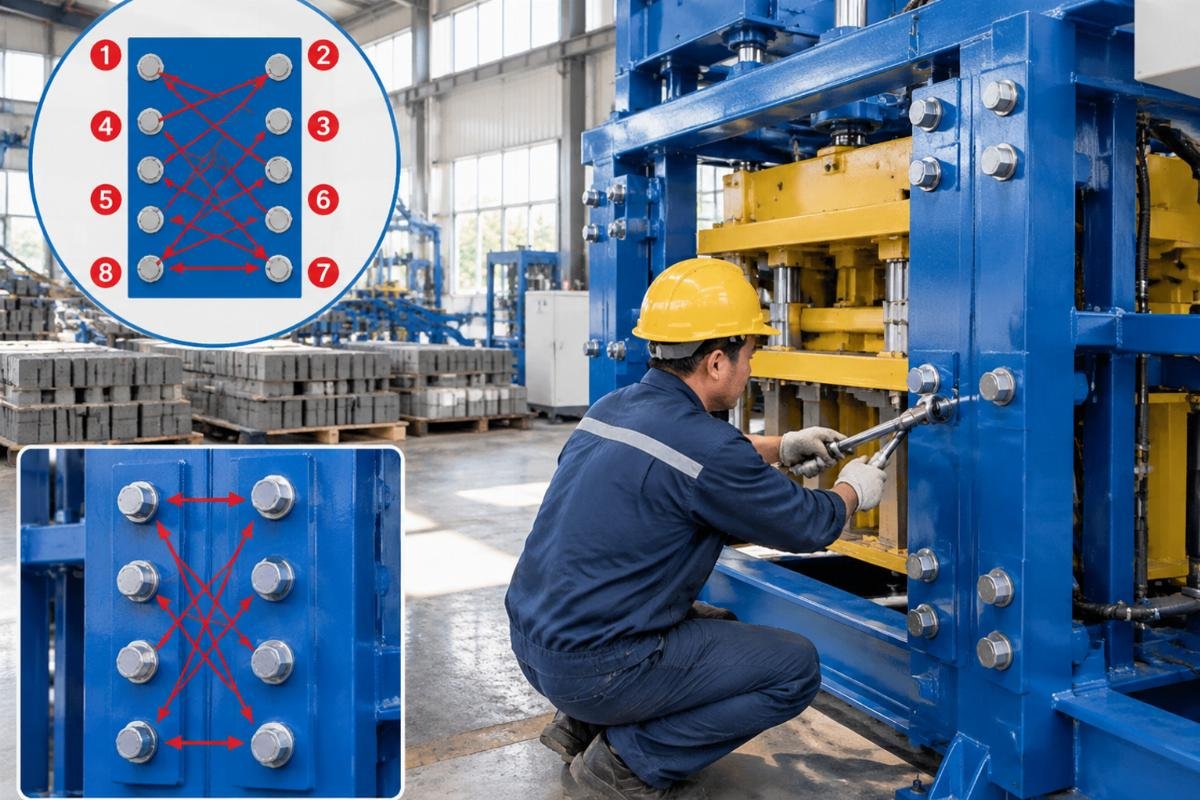
A common misconception among local technicians is that tighter bolts are better. In reality, over-torquing can strip threads, stretch bolts beyond their yield point, and distort the machine frame, leading to misalignment of critical components. The correct approach involves using a calibrated torque wrench and following a specific tightening sequence.
For the main frame bolts, use a cross-pattern tightening method. Start from the center and work outward in a diagonal pattern. This distributes the clamping force evenly across the joint, preventing warping. Apply torque in stages: first to fifty percent of the final value, then to seventy-five percent, and finally to the full specified torque. This stepwise approach allows the materials to settle and ensures uniform pressure. [NEED_CITE: standard bolted joint assembly procedures per mechanical engineering guidelines]
In the Middle East, a distributor reported issues with loose foundation bolts due to skipping secondary tightening. The initial vibration run settled the machine, relaxing the bolt tension. Performing a secondary torque check after the first few hours of operation is crucial. This re-tightening compensates for any settlement in the foundation or gasket compression. Ignoring this step leads to gradual loosening, misalignment, and eventual failure of the anchoring system. By adhering to proper torque sequences and re-check intervals, you ensure the machine remains rigid and aligned throughout its operational life.
How to Conduct the First Test Run?
Starting with dry cycles allows for the detection of mechanical binding and unusual noises before concrete introduces abrasive wear risks.
The first test run is a diagnostic phase, not a production start. Begin with dry cycles, operating the machine without concrete. This allows you to observe the movement of the mold, the feed drawer, and the vibration table in a clean environment. Listen for unusual noises such as grinding, knocking, or squeaking, which indicate misalignment or insufficient lubrication.
Check the smoothness of the mold movement. It should slide freely without resistance. If binding occurs, stop immediately and re-verify the guide alignment. Inspect the hydraulic system for leaks and ensure that all valves operate correctly. Verify that the limit switches or mechanical stops are positioned accurately to prevent over-travel. [NEED_CITE: standard commissioning procedures for hydraulic machinery]
Only after several successful dry cycles should you introduce concrete. Start with a lean mix to minimize stress on the new assembly. Monitor the machine closely for any signs of vibration irregularity or structural movement. This cautious approach helps identify and resolve minor issues before they escalate into major repairs. It also provides an opportunity to train operators on the correct handling procedures, ensuring they understand the machine’s behavior and limits. A disciplined first test run sets the tone for reliable long-term operation.

Conclusion
Precision in assembly dictates the longevity and efficiency of manual brick machines.
Successful installation relies on meticulous attention to mold alignment, vibration balance, and bolt torque rather than brute force. By following these structured steps, operators can avoid common pitfalls that lead to premature failure. A well-assembled machine not only produces higher quality blocks but also reduces maintenance costs and downtime, ensuring a sustainable operation.
Leave a Reply