

Belt Conveyor for Aggregates Alignment Calibration Standards Wholesale Supplier
Most belt deviation is not a quality defect; it is an installation error exceeding tolerance limits.
Proper alignment and calibration of belt conveyors are critical for continuous aggregate supply in block manufacturing. Adhering to strict centerline and tension standards prevents premature wear and costly downtime. The core requirement is maintaining centerline deviation within acceptable millimeter-per-meter ratios, ensuring pulley parallelism, and applying calculated tension rather than maximum force. This approach stabilizes the transport of raw materials like sand and gravel into QT series block lines, ensuring consistent production output.
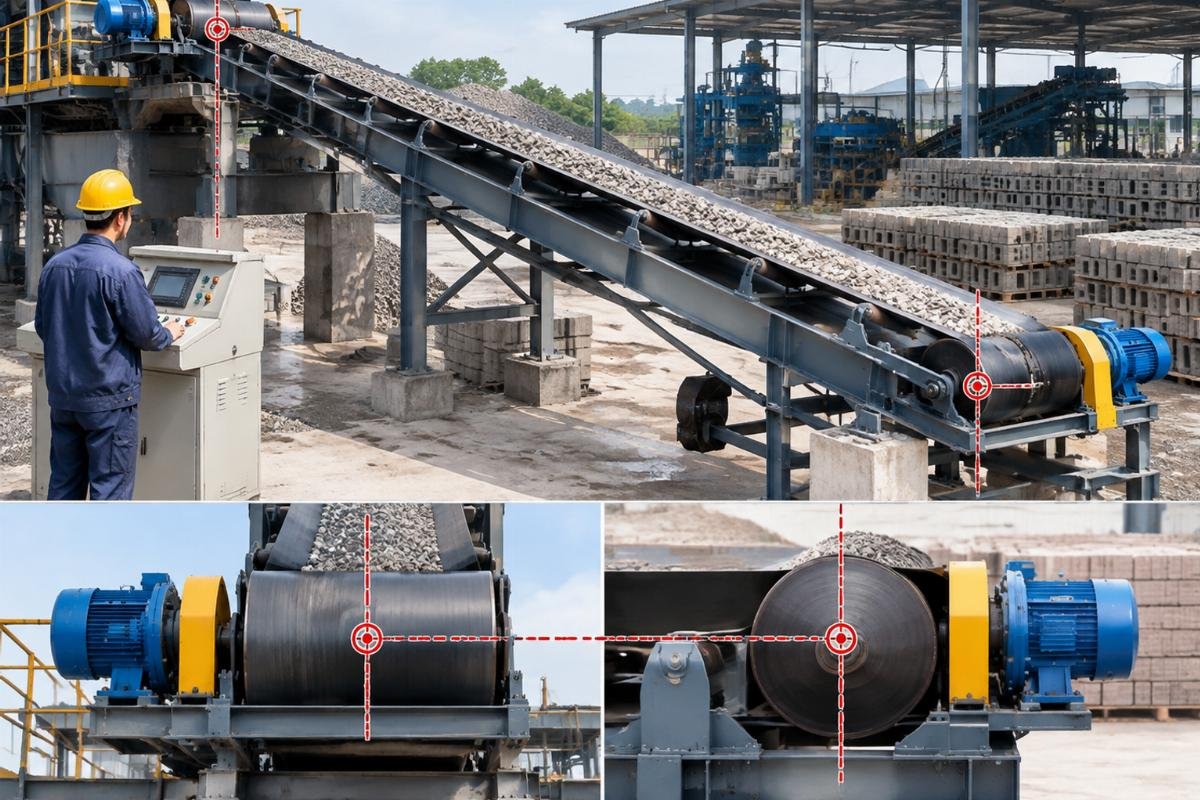
Having managed logistics and documentation for heavy machinery exports from Qingdao Port to Santos, I learned that the bill of lading is only the beginning of the responsibility. A shipment of QT8-15 block machines destined for a quarry in Minas Gerais, Brazil, arrived with all customs clearance handled smoothly. However, weeks later, the client reported severe belt tearing on the aggregate feeding section. The local team had installed the conveyor without referencing specific Belt Conveyor Alignment Standards, resulting in a head and tail pulley misalignment that exceeded fifteen millimeters. The friction generated by this deviation shredded the belt edges, halting the entire production line for weeks. This incident highlighted that equipment durability is irrelevant if the foundational installation ignores basic geometric truths.
Why Does Belt Deviation Cause Critical Downtime?
Misalignment leads to significantly faster wear rates and unplanned operational stops. When a conveyor belt runs off-center, it does not merely rub against the frame; it undergoes asymmetric stress that compromises the structural integrity of the belt carcass and the supporting idlers. In aggregate handling, where materials are abrasive and heavy, even minor deviations amplify quickly.
The primary mechanism of failure is edge wear. As the belt drifts, one side bears the full load while the other lifts slightly, causing the belt to fold or crease over idler ends. This action generates heat and friction that can delaminate the rubber cover from the fabric plies. For a block plant relying on a steady feed of sand and stone, a stopped conveyor means the mixer sits idle, the hydraulic press waits, and the curing cycle is disrupted. The cost of such downtime often far exceeds the price of the replacement belt itself.
A common misconception is that belt deviation indicates a defective product. In reality, most cases stem from installation practices that ignore established tolerances. If the conveyor structure is not square to the centerline, or if the pulleys are not parallel to each other, the belt will naturally seek the path of least resistance, which is usually off-track. Understanding this dynamic is essential for maintenance teams who might otherwise waste time adjusting tension when the root cause is geometric.
What Are the Key Alignment Tolerances?
Centerline deviation must be kept within strict limits, typically measured in millimeters per meter of conveyor length. Pulley parallelism is equally key to stable operation. These tolerances are not arbitrary; they are derived from the physical behavior of flexible belts under tension and load. Ignoring them invites immediate mechanical failure.
| Alignment Factor | Acceptable Standard | Consequence of Exceeding Limit |
|---|---|---|
| Centerline Deviation | Within 3mm per meter | Edge tearing, material spillage |
| Pulley Parallelism | Parallel to within 1mm | Belt tracking instability, wander |
| Idler Squareness | Perpendicular to centerline | Uneven wear, increased drag |
| Structure Levelness | Level across width | Material accumulation on one side |
[NEED_CITE: ISO standard for conveyor belt alignment tolerances]
In a project involving a Chilean aggregate plant, incorrect attention to these tolerances led to significant productivity losses. The maintenance team had focused on tightening the belt to prevent slippage during the wet season but had neglected to verify that the idler frames were square to the conveyor centerline. As a result, the belt tracked unpredictably, causing uneven wear on the idler rollers. The frequency of roller replacements doubled, and the belt began to stretch unevenly, further exacerbating the tracking issues. This case illustrates that tension cannot compensate for poor alignment.
When verifying these standards, technicians should use precise measuring tools rather than visual estimation. A string line stretched along the conveyor centerline provides a reliable reference for checking pulley positions. Similarly, a square tool can confirm that idler frames are perpendicular to the direction of travel. These simple checks, performed during installation, prevent complex troubleshooting later. Adherence to Belt Conveyor Alignment Standards ensures that the conveyor operates as designed, with minimal friction and maximum efficiency.
How to Calibrate Tension Correctly?
Use the sag method or a tension meter to determine optimal tightness; avoid over-tightening. Excessive tension is a frequent cause of premature bearing failure and belt stretch. The goal is to apply enough force to prevent slippage under full load while allowing the belt to flex naturally over idlers.
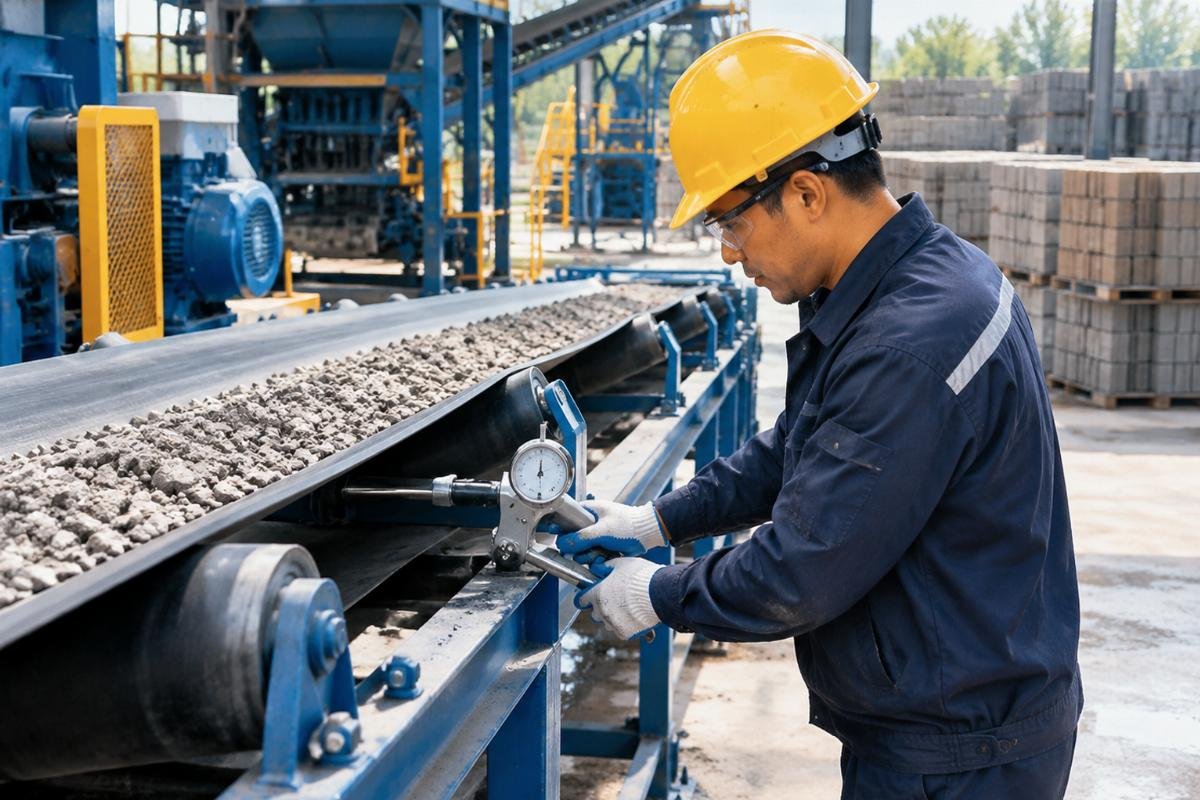
The principle behind proper tensioning is balance. Too little tension causes the belt to slip on the drive pulley, especially when starting under load or when the material is wet. This slippage generates heat that can damage the belt cover and the pulley lagging. Conversely, too much tension places excessive radial load on the bearings of the head and tail pulleys, as well as the idlers. This load accelerates bearing wear and can deform the pulley shafts, leading to misalignment over time.
To calibrate tension correctly, start by running the conveyor empty. Observe the belt’s behavior between idler sets. There should be a slight, consistent sag. If the belt is taut like a guitar string, the tension is likely too high. If it sags excessively and touches the return idlers, it is too loose. Adjust the take-up unit incrementally, checking the effect after each adjustment. It is crucial to allow the belt to settle and run for a period before making final adjustments, as new belts often stretch slightly during initial operation.
In the Mexican block factory case mentioned earlier, the maintenance team initially assumed that tighter tension would solve their tracking problems. Instead, it accelerated the wear on the idler bearings, leading to frequent failures. Once they reduced the tension to the recommended level and corrected the idler alignment, the system stabilized. This experience underscores the importance of following calculated tensioning methods rather than relying on intuition. Proper calibration extends the service life of both the belt and the supporting components, reducing overall maintenance costs.
Step-by-Step Installation Checklist
Verify foundation level, square idlers, and align head/tail pulleys. A systematic approach to installation ensures that all components meet the required Belt Conveyor Alignment Standards before the conveyor is commissioned. Skipping steps or assuming that "close enough" is acceptable leads to operational issues that are difficult and expensive to correct later.
- Check Foundation Levelness: Ensure the support structure is level across its width and along its length. An uneven foundation causes the conveyor frame to twist, making proper alignment impossible. Use a spirit level to verify that the mounting points are at the same elevation.
- Establish Centerline Reference: Mark the theoretical centerline of the conveyor on the floor or foundation. This line serves as the reference for all subsequent alignment checks. Use a chalk line or laser level for accuracy.
- Install Head and Tail Pulleys: Position the head and tail pulleys so that their axes are perpendicular to the centerline and parallel to each other. Measure the distance from the centerline to each end of the pulley shaft to ensure symmetry. Adjust until the deviation is within the specified tolerance.
- Square the Idler Frames: Install the idler frames so that they are perpendicular to the centerline. Check each frame individually, as cumulative errors can cause significant tracking issues. Use a square tool to verify the angle of each frame relative to the centerline.
- Mount the Belt: Carefully place the belt on the idlers, ensuring it is centered. Avoid dragging the belt, which can damage the edges. Join the belt ends according to the manufacturer’s instructions, ensuring the splice is straight and secure.
- Apply Initial Tension: Use the take-up unit to apply initial tension. Run the conveyor empty and observe the tracking. Make minor adjustments to the idler angles if necessary to guide the belt to the center. Do not use idler adjustment to correct major misalignment; fix the root cause instead.
- Load Testing: Gradually introduce material to the conveyor, starting with a light load. Observe the belt’s behavior under load, as the weight of the material can affect tracking. Make final adjustments to tension and alignment as needed.
This checklist provides a structured framework for installation, reducing the risk of errors. By following these steps, installers can ensure that the conveyor operates efficiently and reliably from day one. In turnkey projects, such as those delivered by Shiyue, this process is often supervised by experienced technicians to guarantee compliance with international standards. However, understanding these steps empowers local maintenance teams to perform routine checks and minor adjustments, maintaining optimal performance over the long term.
Conclusion
Precision in alignment and calibration defines the longevity of your aggregate handling system.
Ignoring Belt Conveyor Alignment Standards invites unnecessary wear and operational disruption. By focusing on geometric accuracy, appropriate tension, and systematic installation, plant managers can ensure stable and efficient production. These practices transform the conveyor from a potential bottleneck into a reliable component of the block manufacturing process.
Leave a Reply